Acanthocalycium thionanthum: Characteristics and Care
Get ready to meet a true star of the cactus world – Acanthocalycium thionanthum! This charming little plant, native to the rugged landscapes of Argentina, is a real crowd-pleaser. With its quirky cluster of spiny stems and vibrant yellow blooms that arrive each summer, it’s sure to delight cactus enthusiasts and novice plant parents alike. So let’s dive into the fascinating world of this prickly beauty and learn all about how to keep it thriving in your home or garden.
About Acanthocalycium thionanthum
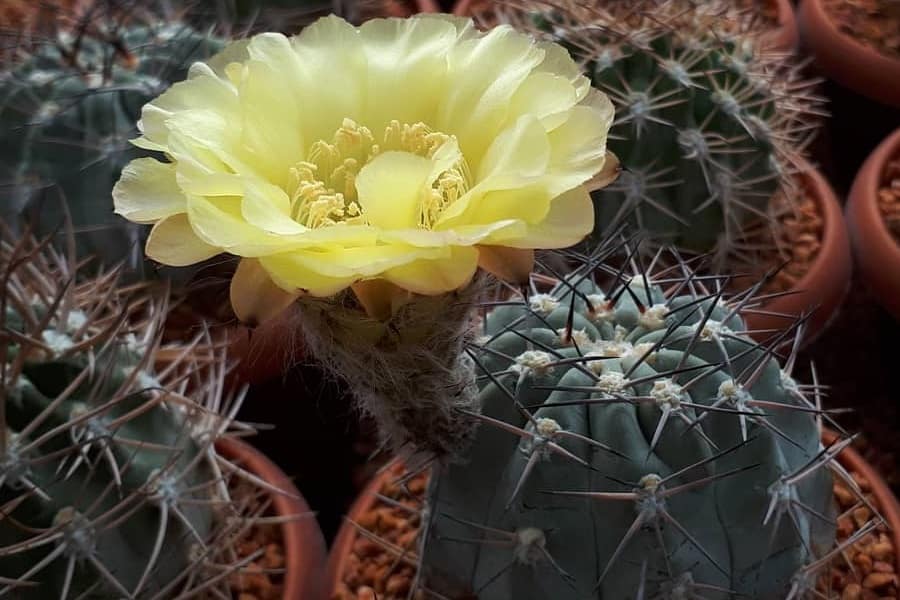
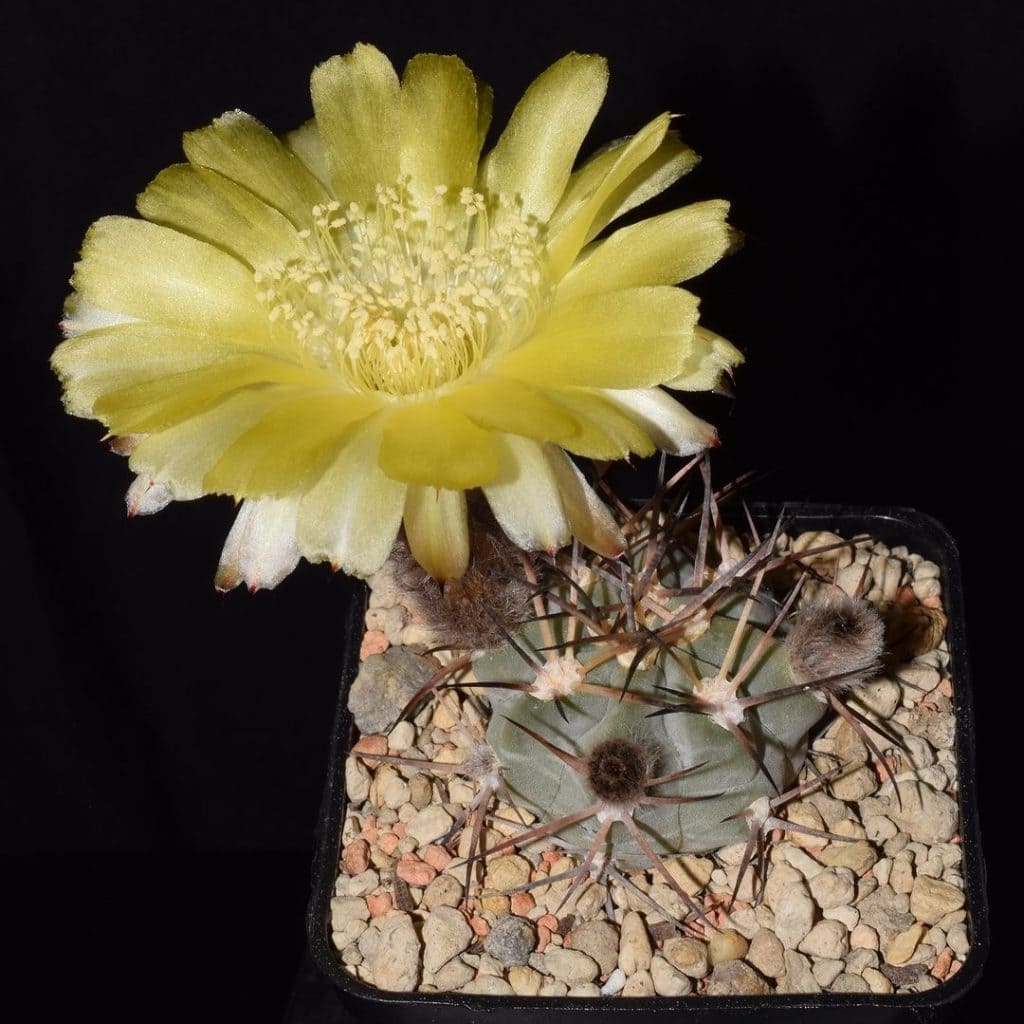
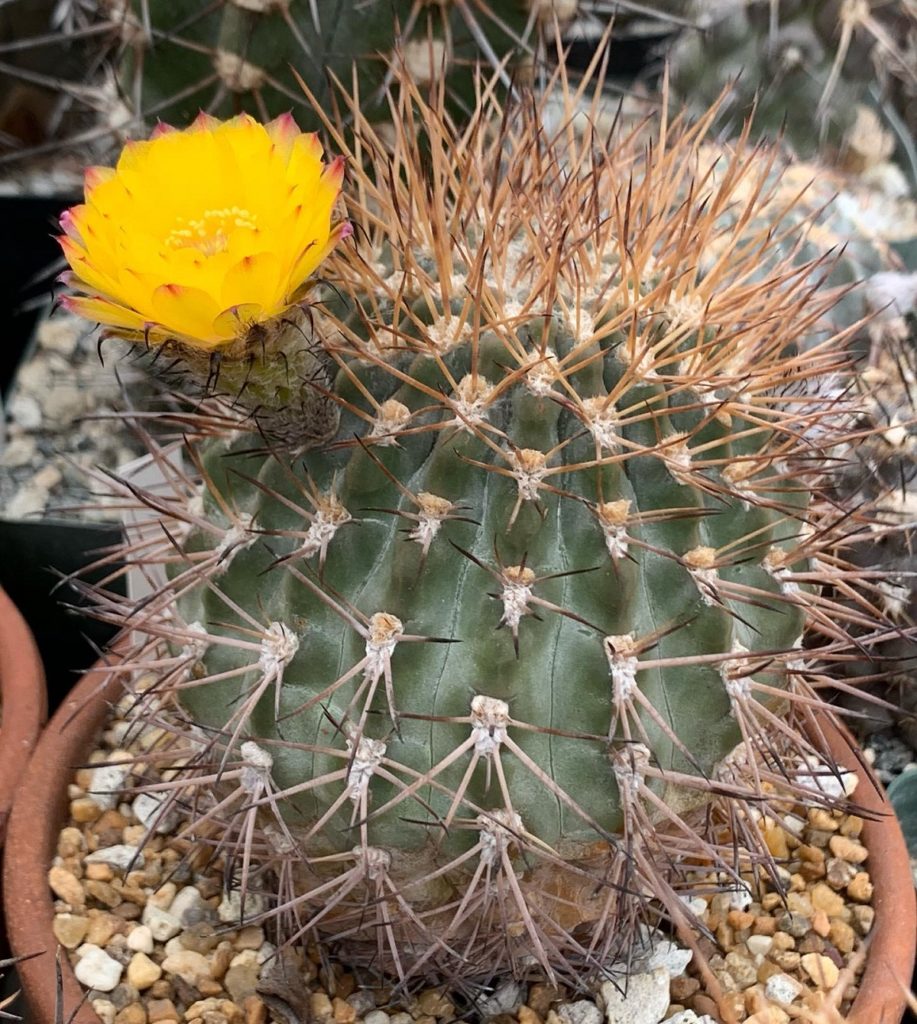
Also known as Echinopsis thionantha, Acanthocalycium thionanthum is a resilient cactus with a fun, distinctive look. It can grow as a single cylindrical stem or in clusters, covered in ribs lined with white and brown spines. But the real showstopper comes when the yellow, bell-shaped flowers bloom at the tips in the summer months, creating an eye-catching contrast against the plant’s spiny stems. This hardy plant is right at home in the rocky, arid regions of Argentina where it naturally grows.
Related Post:
82 Types of Echinopsis Cacti [With Pictures]
How to Care For Acanthocalycium thionanthum
Light Requirements
Acanthocalycium thionanthum thrives in the warm embrace of sunlight. To recreate its natural habitat, provide your cactus with a sunny spot that receives ample direct light throughout the day. If you live in a region with intense summer heat, you can offer a bit of afternoon shade to prevent sunburn. Additionally, consider investing in a high-quality grow light to supplement natural light during the winter months or in low-light conditions.
Watering Wisdom
Like most cacti, Acanthocalycium thionanthum is a drought-tolerant champion. To keep your prickly pal happy, adopt the “soak and dry” watering method. During the summer months, water your cactus every 3-4 days, allowing the soil to dry out completely between waterings. In the winter, reducing watering to once a week or even less is recommended. Remember, overwatering is the nemesis of cacti, so always let the soil dry out before quenching your plant’s thirst.
Soil Secrets
Acanthocalycium thionanthum isn’t a diva when it comes to soil requirements. A well-draining, porous mix containing sand and clay will provide the perfect environment for your cactus to flourish. A standard cactus soil mix from your local nursery should do the trick. Don’t forget to choose a pot with ample drainage holes to prevent water from accumulating and causing root rot.
Fertilizer Frenzy
While Acanthocalycium thionanthum can survive on minimal nutrients, a little boost from a balanced cactus fertilizer can help it reach its full potential. During the growing season, from May to October, treat your cactus to a monthly dose of fertilizer. However, even without fertilizer, this hardy plant will still put on a stunning show if you nail the soil, light, and watering requirements.
Temperature and Humidity
Acanthocalycium thionanthum revels in warm, arid conditions. Ideally, temperatures should range between 45°F (7°C) and 85°F (29°C). If temperatures dip below 45°F (7°C), you may notice a slowdown in growth, so be sure to provide shelter during colder months. As for humidity, this cactus prefers dry air, so there’s no need to worry about misting or humidifying the environment.
Pests and Problems
While Acanthocalycium thionanthum is generally resilient, it’s not immune to the occasional pest problem. Keep an eye out for whiteflies, mealybugs, and aphids, which can wreak havoc on your cactus. If you spot any uninvited guests, act swiftly with a non-toxic solution to prevent further infestation. Root rot is another potential issue, but following proper watering practices should keep this problem at bay.
Pruning Pointers
Acanthocalycium thionanthum is a well-behaved cactus that doesn’t require frequent pruning. However, if your plant starts to outgrow its designated space, you can trim it back to maintain its desired shape and size. Just remember to use clean, sharp pruning shears and sterilize them before and after use to prevent the spread of disease.
Potting and Repotting
Acanthocalycium thionanthum can happily reside in shallow clay or plastic trays, or even traditional pots. The key is to ensure adequate drainage to prevent waterlogging. As for repotting, these cacti generally only need to be repotted when they outgrow their current container. Spring is the ideal time for this task, as it coincides with the plant’s growing season. If you miss the spring window, summer is also an acceptable time for repotting.
When it’s time to repot, gently tap the container to loosen the roots and remove the plant. Discard any old, spent soil and trim away any dead roots. Then, carefully transplant your cactus into a fresh, well-draining soil mix in its new home. Allow your plant to recuperate for a week before resuming your regular watering routine.

Propagating Acanthocalycium thionanthum
One of the most rewarding ways to grow Acanthocalycium thionanthum is by propagating it from seed. This allows you to witness the entire life cycle of the plant, from germination to its first prickly stems and cheerful yellow blooms. Here’s a step-by-step guide to propagating this cactus beauty:
- Timing is key – Sow the seeds directly after the last frost of spring when temperatures are warm enough, around 70-80°F (21-27°C).
- Prepare your containers by sterilizing them with a 1:9 bleach solution, rinsing thoroughly, and allowing to fully dry.
- Fill your containers with a well-draining cactus/succulent seed starting mix.
- Sow the seeds by gently pressing them into the soil surface about 1/4 inch deep and lightly covering them.
- Keep the seed trays warm, moist, and provide some humidity by covering with a plastic dome or glass plate.
- In 7-14 days, you should see the first sprouts emerge! Remove the cover gradually once the seedlings are well-rooted, after 1-2 weeks.
- Provide bright indirect light and good ventilation. Avoid direct sunlight until the young plants are more established.
- Once the seedlings develop their first spines, you can begin exposing them to longer periods of direct sun to accustom them.
With a little patience and care, you’ll soon have a fresh batch of Acanthocalycium thionanthum to enjoy for years to come!