Step-by-Step: Growing Aloe Vera from Seed
Are you ready to embark on an exciting adventure of growing your very own aloe vera plants from scratch? Get ready to dive into the magical world of botanical wonders as we show you just how simple and fulfilling it can be. Forget about those mundane cuttings, because with seeds, you have the power to cultivate some truly unique and rare versions of this incredible plant.
In this guide, we’ll take you on a journey through the fascinating process of growing aloe vera from seeds. We’ll cover everything you need to know, from the basics to the nitty-gritty details. So grab your gardening gloves and let’s get started on this green-thumb extravaganza. By the end, you’ll be well-equipped with all the knowledge and steps required to successfully grow aloe vera from seed. So hold on tight, because we’re about to unveil the secrets of this plant-growing masterpiece!
How to Grow Aloe Vera from Seed
Step 1: Finding the Seed
So, you’re ready to embark on this exciting aloe vera growing journey! The first step is finding those precious seeds. You have a few options here. You can reach out to local gardeners, dealers, or nurseries to see if they have any seeds available or can point you in the right direction. They’re like the treasure maps for your gardening adventure!
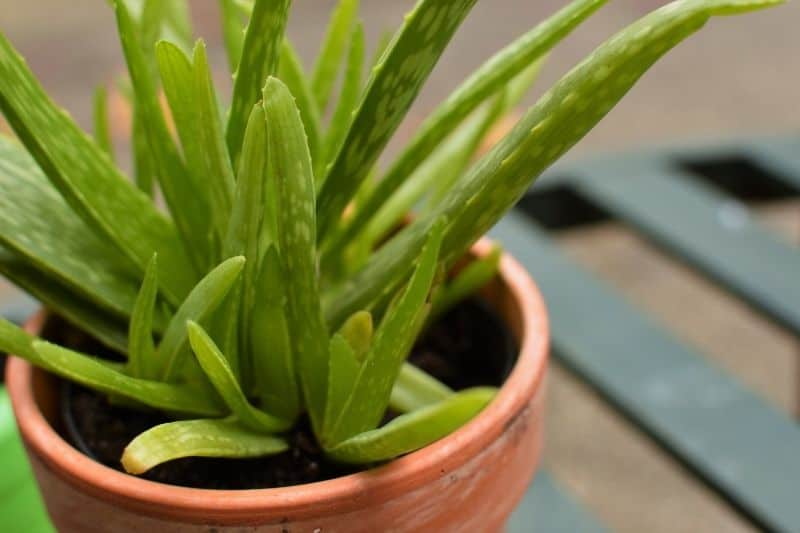
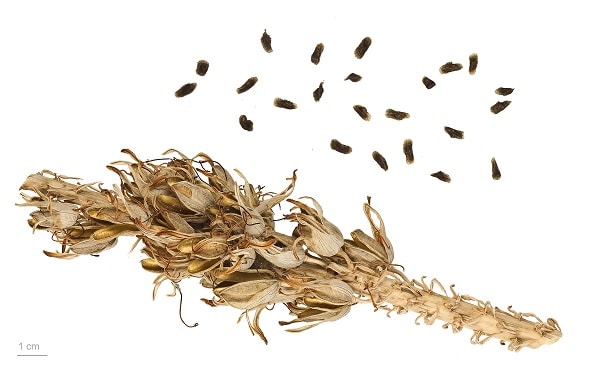
Another option is to extract the seeds from mature aloe plants. These plants need to be at least four years old, so they’re like the wise old sages of the aloe world. Inside their flowers, you’ll find gray-brown to black seeds just waiting to be harvested. Remember, though, only grab the ones that aren’t too light in color. We want seeds that are ripe and ready for their big moment!

Step 2: Preserving the Seed
Now that you have your shiny seeds in hand, it’s time to decide how you want to go about sowing them. If you’re feeling particularly eager, you can sow them right away. No time to waste, right? But if you prefer to wait for the perfect moment, you can store them until spring rolls around. Keep them in a cool and dark place, like a secret stash for aloe vera superheroes. Just make sure you use them within a year. We don’t want those little seeds feeling neglected!
Step 3: Sowing the Seed
The time has come to sow those seeds and watch them sprout into magnificent plants. First, choose a good medium, like a cozy home for your growing aloe vera family. A mix of equal parts peat and sand is a great choice because it keeps things nice and loose, not too soggy. Mix it up, add some water, and make sure it’s all well-blended. You can even throw in some compost to give your soil some superpowers.
Now, onto the container. You have the freedom to go wild here and choose any container that tickles your fancy. But if you’re new to this gardening gig, a flat container is a good place to start. It requires less soil and is easier to handle. Before you add the medium, though, give your container a good scrub. We want a clean and healthy environment for our little seedlings, free from any unwanted fungal friends.
Pour the medium into the container, sprinkle some water, and place the seeds about an inch apart from each other, like little soldiers ready to conquer the garden. Lightly cover them with some sand, their cozy blanket, and place the container in a bright spot with warm temperatures. Think of it as a sun-soaked vacation for your seeds!
Step 4: Watering the Medium
Now it’s time to show some TLC to your sprouting seeds. For the first few weeks, lightly moisten the soil to give your seeds a gentle wake-up call. They’ll start sprouting in about two to four weeks, depending on the aloe vera plant variety you’re growing. Pro tip: If you’re keeping them indoors, give them a warm and cozy spot by placing the container on a heat source. But, be sure to turn off the heat once those roots have settled in. We don’t want to bake our little plants!
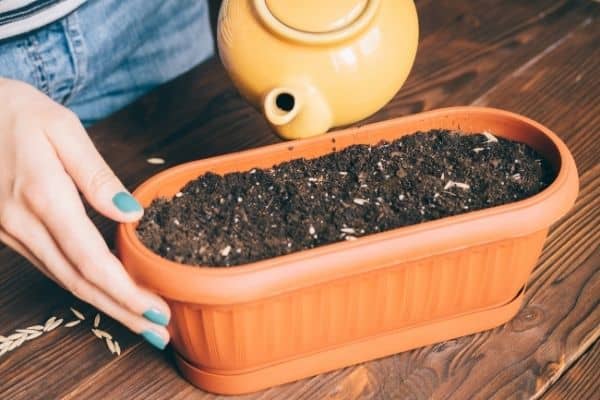
Oh, and one more thing. If you’re using a non-sterile medium (sounds fancy, right?), don’t cover your containers with plastic. We want to steer clear of any fungal invaders. Instead, water from the bottom, like a hydration ninja. This keeps the roots happy and prevents any unwanted fungal parties. And remember, don’t go overboard with the water. Just keep things moist, not drenched.
Related Post:
How to Plant an Aloe Vera Without Roots
Step 5: Potting the Seedlings
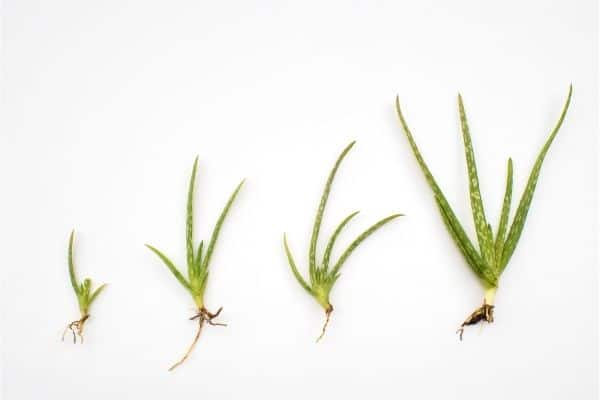
Get ready to give your seedlings their own personal space! Once they’ve sprouted four or more leaves and are looking like little plant superheroes, it’s time to transplant them into their own pots. Fill the pots with a mix of pumice, sand, and organic compost. It’s like creating a luxurious spa retreat for your growing aloe vera stars!
Gently scoop out the seedlings from their former medium and give them a cozy new home in the pots. Water them a few times a week, but don’t drown them in affection! We want to give them just enough water to quench their thirst without overwhelming them.
Step 6: Rooting for Success
Congratulations! You now know all the steps to grow aloe vera from seed. It’s a simple and rewarding process that will bring joy and fulfillment as you watch your plants flourish. To keep things on track, remember to maintain the perfect conditions. Not too much water, not too little. We want that Goldilocks zone of moisture. And keep an eye out for any sneaky fungal foes. Clean pots, organic mediums, and warm temperatures are your secret weapons against them.
And here’s a friendly tip: Check on your growing plant buddies regularly. By keeping an eye out for any hiccups along the way, you can catch and correct any issues early on. That way, you’ll avoid any dramatic plant plot twists later on.
You’re now armed with all the knowledge you need to grow aloe vera like a gardening champ. So go ahead, gather your seeds, and let the aloe vera magic unfold. Enjoy the journey and cheer on your plants as they grow into happy, healthy green wonders!