Successful Haworthia Propagation: A Comprehensive Guide
Looking to expand your succulent collection? Well, you’re in luck! The Haworthia is not only popular but also super easy to take care of. Whether you want to add a touch of green to your indoor space or spruce up your garden, Haworthias are the perfect choice.
In this guide, I’ll spill all the secrets on how to grow these charming plants from cuttings or offsets. Trust me, with a little love and care, you’ll be amazed at how quickly they can multiply. So if you’re curious and eager to learn, stick around because we’re about to dive into the wonderful world of Haworthia propagation!
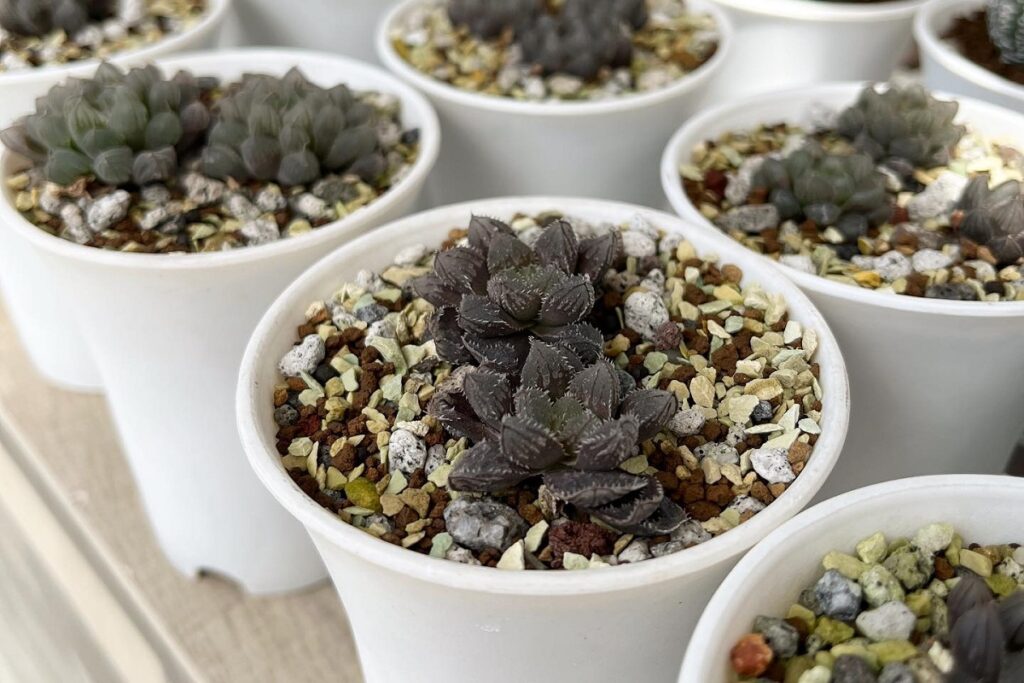
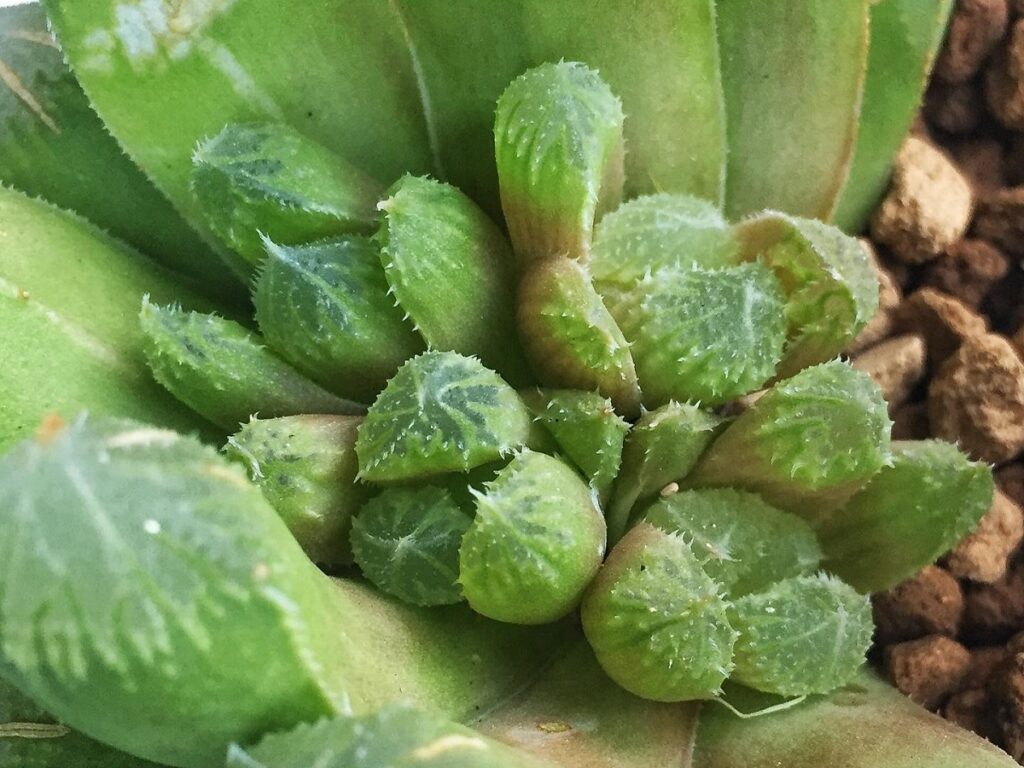
Haworthia Propagation Through Offsets
Let’s talk about an easy and rewarding way to propagate Haworthia: offsets! These little clones form around the main plant’s root system and can be removed carefully to create new plants. Here’s how you do it:
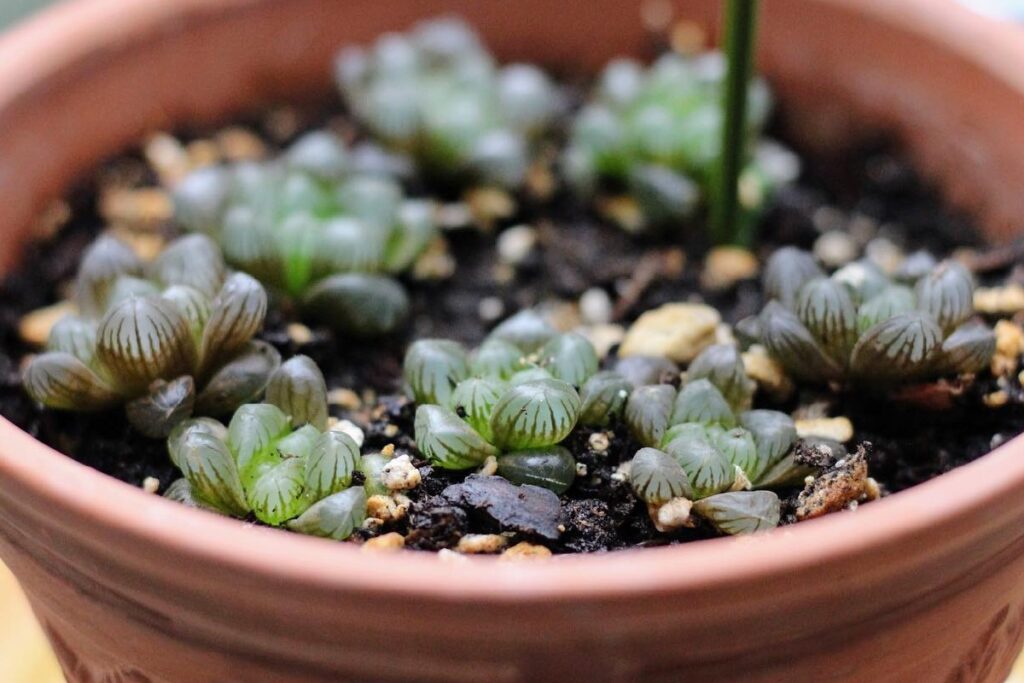
- Gently remove the offsets from the main plant, being careful not to harm its tuberous roots. Try to keep the root system intact for better success.
- Allow the offsets to sit for about 24 hours so they can develop a protective layer called callus over their cut areas before planting them in soil. This reduces the risk of rot and increases the chances of successful propagation.
- Plant each offset in a well-draining potting mix, burying them about two inches deep. Make sure not to bury any leaves in the soil.
- Give them a light watering and keep them away from direct sunlight until they establish themselves. It may take one to three weeks for the offsets to settle and start growing, so be patient!
Following these steps will help you successfully propagate Haworthia through offsets. Remember, young plants take time to show growth, but once they start, they flourish!
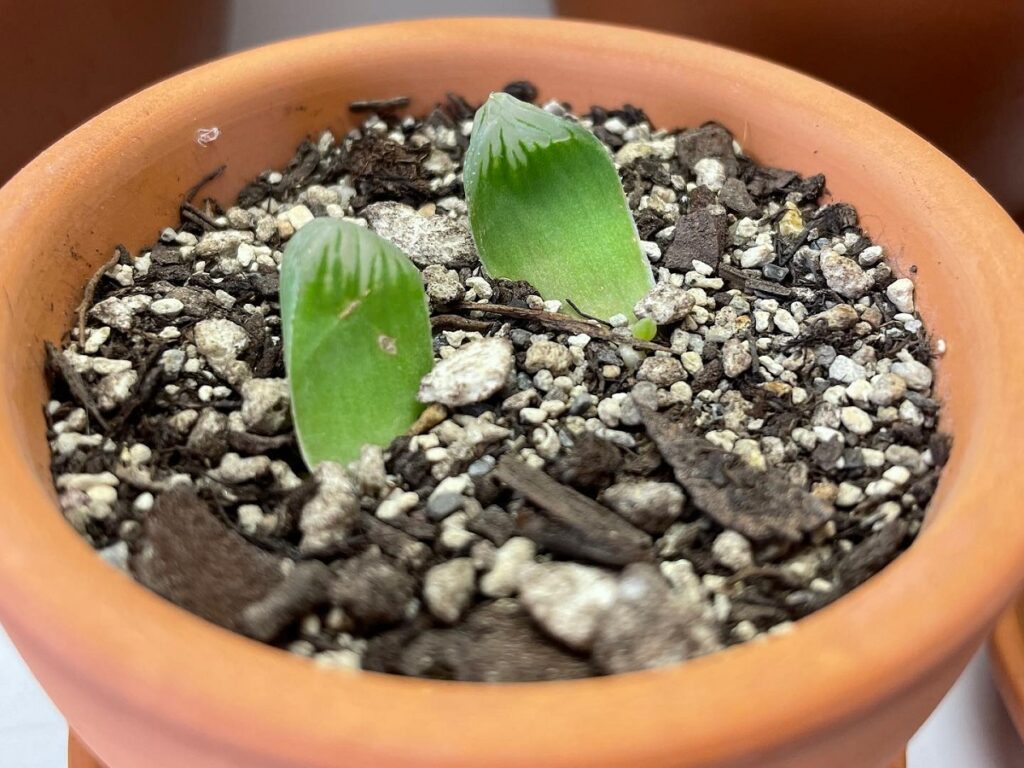
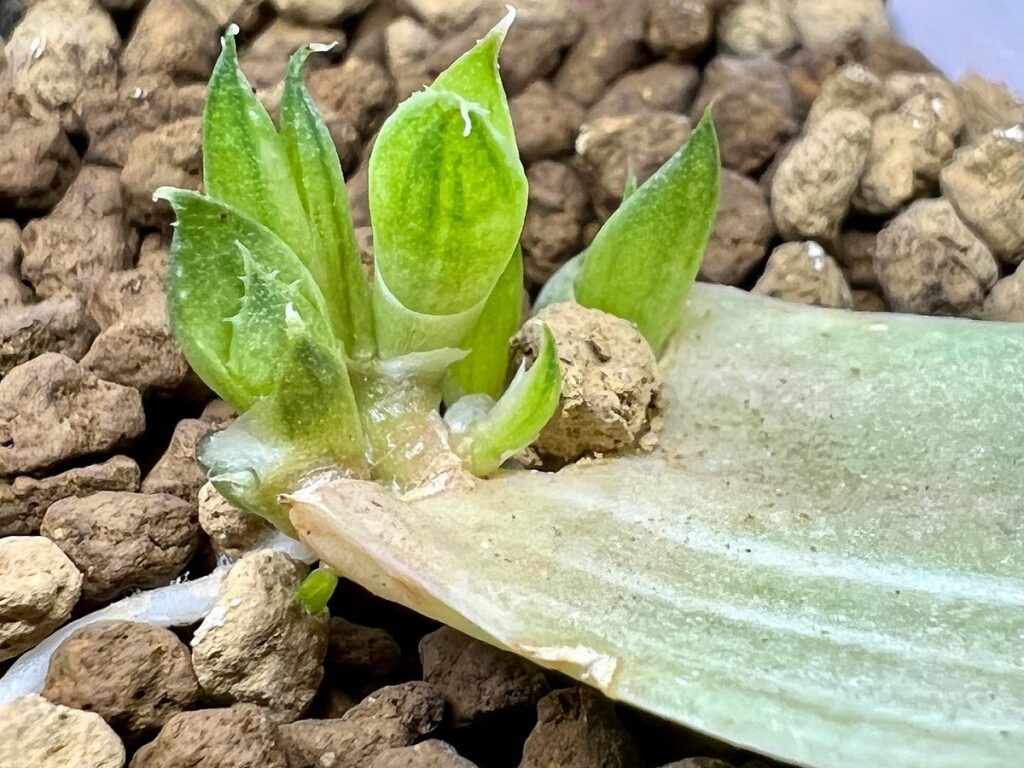
Haworthia Propagation Through Leaf Cuttings
Now, let’s explore another fantastic method to expand your collection: Haworthia propagation from leaf. Here’s what you’ll need:
- A clean knife or scissors.
- Disinfectant wipes to clean the blade.
- Healthy, fleshy leaves from the Haworthia plant you want to propagate. Make sure they are not dried out or wilted.
Follow these steps:
- Clean the blade of your knife with disinfectant wipes to prevent any potential infections on the new plants.
- Carefully remove healthy leaves from your chosen Haworthia plant, making sure they still have some stem attached. Let the leaves sit in a cool, dry place overnight so the edges can develop callus.
- Create small indentations in the soil using your finger or a pencil tip. Gently place each leaf cutting into its own hole, pressing it down lightly to secure it.
- To maintain consistent moisture levels, cover each pot with plastic wrap or place them in a humidity dome. This keeps the moisture in while still allowing necessary air exchange for root development.
- Water the cuttings sparingly but regularly. Too much water can lead to rotting if not monitored carefully.
- Keep the newly planted cuttings in bright, indirect sunlight to prevent over-watering and encourage healthy growth.
With these simple steps, you can successfully propagate Haworthia through leaf cuttings and enjoy a growing collection!
Haworthia Propagation Through Seeds
Are you ready to save some money and expand your collection even further? Propagating Haworthia through seeds is an excellent option. Follow these steps to get started:
- Make sure you have good-quality Haworthia seeds with intact seed coats and no visible damage or discoloration. Soak the seeds overnight in lukewarm water to aid in germination.
- Prepare the soil for your Haworthia seedlings. Choose a potting mix designed specifically for succulents and cacti, as it provides the right drainage and nutrition. Lightly moisten the soil before planting the seeds.
- Sow the pre-soaked seeds on the surface of the soil, spacing them at least 1/2 inch apart. You can cover them with a thin layer of sand if desired, but avoid burying them too deeply.
- Keep the seeds warm and observe closely for signs of growth. Look out for small white hairs emerging from the soil surface, indicating successful germination and growth!
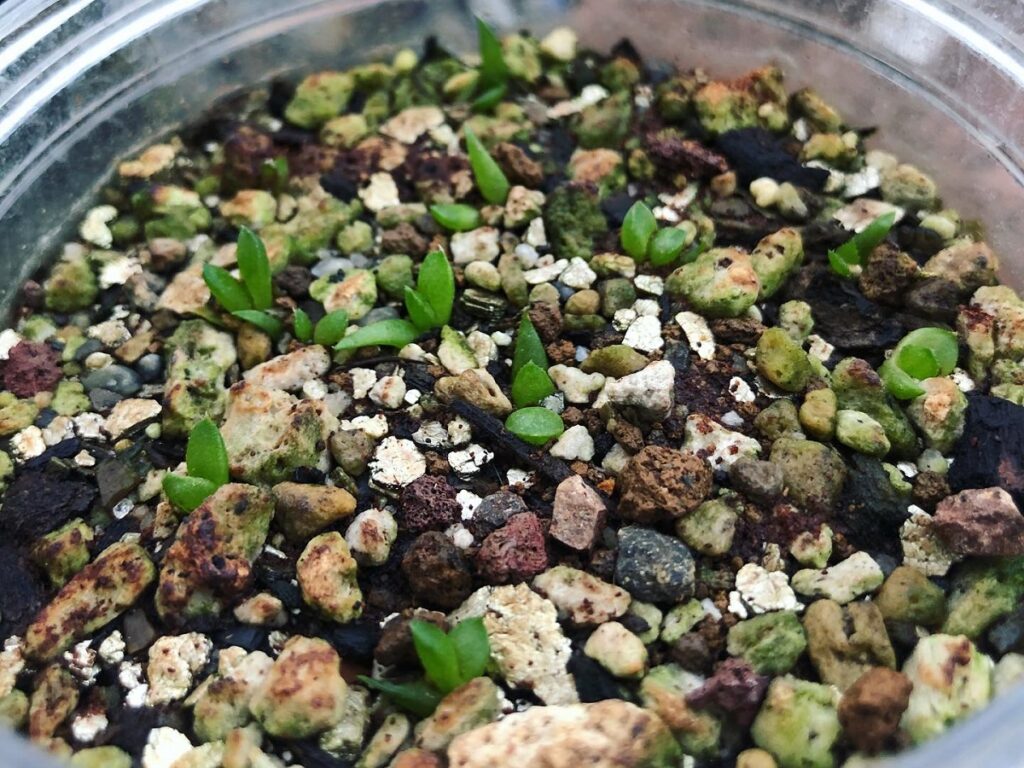
By following these steps, you can propagate Haworthia through seeds and watch as your collection expands with new, thriving plants. Enjoy the process of growth and discovery!
What Is The Best Way To Propagate Haworthia?
When it comes to propagating Haworthia, there are three main methods to choose from: leaf cuttings, seeds, and offsets. Each method has its own pros and cons, so let’s take a closer look!
Leaf cuttings are the most popular way to propagate Haworthia. All you need is a clean knife or scissors and some bright light. Start by gently cutting off the lower leaves from the stem, making sure to include a part of the stem. Place the cut leaves on top of moist soil in a pot or tray and keep them near a bright light source. Within a month, you should see new plants sprouting!
Propagation through seeds is another option, but it takes more time and care. You’ll need to be patient as you wait for the seedlings to germinate. During this time, make sure to provide enough water and protect them from cold temperatures to prevent premature death.
Offset propagation is a quick and efficient method if you want to grow multiple Haworthias at once without waiting too long. Offsets are small clones that are detached from the mother plant and transplanted elsewhere. They usually come pre-rooted and ready to be placed in containers with soil. Just make sure they get plenty of bright light and moisture as they grow!
No matter which method you choose, remember that propagation requires patience. Success may take time, especially if you’re new to it. So take your time, enjoy the process, and watch your Haworthias flourish!
Can Haworthia Grow In Water?
Absolutely! Water propagation is a simple and fascinating way to propagate Haworthia offsets. Here’s how to propagate haworthia in water:
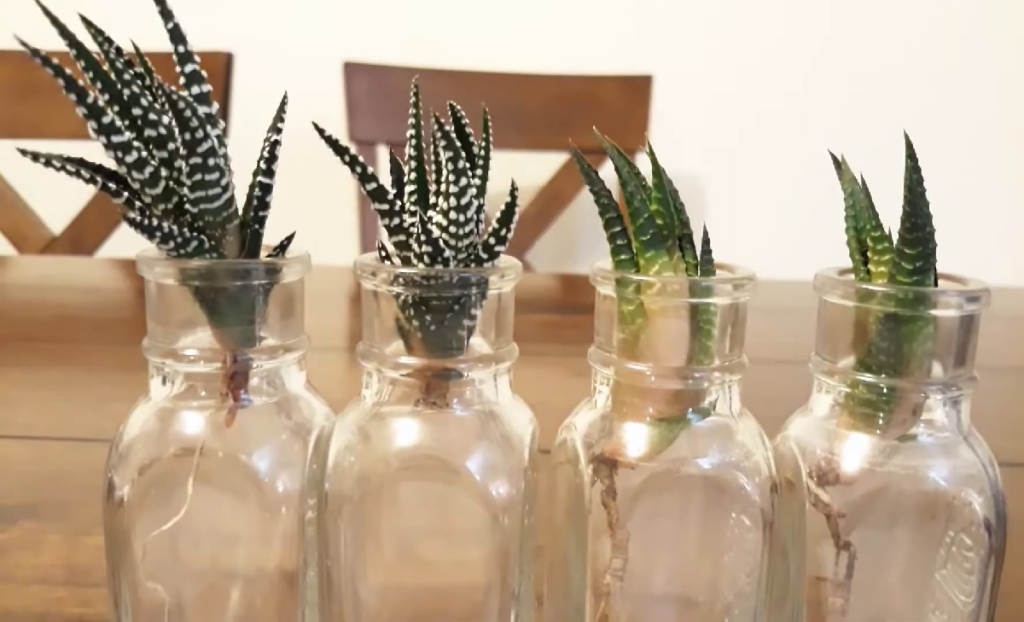
- Start with healthy Haworthia offsets.
- Place the offsets in a container filled with clean water.
- Change the water every few days to keep it fresh.
- After a few weeks, you’ll start to see roots growing from the offsets.
- Once the roots reach about an inch in length, you can transplant the offsets into soil.
- Keep the soil moist, but not overly wet.
- Place the container in a bright location, avoiding direct sunlight.
- With time and care, those offsets will grow into healthy Haworthia plants!
Propagating Haworthia in water is a straightforward and captivating process that allows you to witness the growth of roots firsthand.
How Long Does It Take Haworthia To Root?
Rooting Haworthia propagations can be an exciting process. Let’s take a look at the approximate timeframes for two common methods:
- Offsets without roots: It usually takes around 3-4 weeks for the offsets to establish roots and start growing. During this time, ensure they receive proper care and attention.
- Leaf cuttings: Rooting leaf cuttings generally takes longer, typically around 6-8 weeks for the leaves to develop roots and begin growing. Keep in mind that the success rate of root formation from leaf cuttings is lower compared to offsets. So be patient and give them adequate time to root properly.
When rooting a Haworthia cutting, allow the cut end to dry for at least 24 hours until a protective callus forms. From there, you can either place the cutting directly into moist soil or use rooting hormone before planting. It’s important to monitor your watering habits during this time: too much water can lead to root rot, while too little water can delay the propagation process.
Caring For Haworthia After Propagation
Congratulations on successfully propagating your Haworthia! Now, let’s focus on caring for your new succulent plants to ensure their continued health and growth. Here are a few essential steps to follow:
- Provide adequate sunlight: Haworthias need at least six hours of direct or indirect sunlight per day. If natural light is insufficient, supplement it with grow lights.
- Choose the right soil: Use a well-draining potting mix specifically formulated for succulents. Regular soil can retain too much moisture and cause root rot.
- Monitor the mother plant: If you propagated from offsets, keep an eye on the mother plant for new offsets that can be removed and propagated again if desired. Watch for signs of stress like wilting leaves or brown spots, which may indicate watering issues.
- Watering: Only water the soil when it is completely dry. Succulents like Haworthia prefer infrequent but deep watering. Avoid overwatering, as it can lead to root rot.
Remember, each succulent is unique, and their care requirements may vary. Regularly observe your Haworthia plants and adjust your care routine accordingly. Enjoy the journey of nurturing your new plants and watching them thrive!
How Do I Repot Haworthia?
Repotting your Haworthia after propagation is a straightforward process. Here’s a step-by-step guide:
- Choose a larger container: Ensure the new container has enough space to accommodate the new roots of your Haworthia plant. It should also have drainage holes in the bottom to prevent waterlogging.
- Prepare the potting mix: Use a well-draining potting mix specifically designed for succulents and cacti. This helps prevent root rot and provides the necessary nutrients.
- Gently remove the plant: Carefully take the Haworthia out of its current pot, trying to preserve as much of the root system as possible.
- Place in the new pot: Put the Haworthia in the new container and fill the sides with the potting mix. Firmly press the soil around the roots.
- Water lightly: Once repotted, give the plant a light watering until the soil is slightly moist. Avoid overwatering, as it can lead to root rot.
- Find the right spot: Place the newly repotted Haworthia in a bright location, avoiding direct sunlight. Allow it to acclimate to its new environment.
Repotting is an excellent opportunity to provide fresh soil and more room for your Haworthia to grow. Following these steps will help ensure a smooth transition and continued success for your plant!
Frequently Asked Questions
Should I remove Haworthia pups?
It depends on what you want for your Haworthia. If you want to keep your plant healthy and prevent overcrowding, it’s best to remove the pups when they appear. This allows the main plant to thrive and keeps the soil from getting too compacted. However, if you prefer a fuller, bushier look, you can leave the pups on the main plant. Ultimately, it’s up to your personal preference and what looks best to you.
How do you encourage Haworthia root growth?
To encourage root growth in your Haworthia, create the right environment for the plant. Provide bright, indirect sunlight and use well-draining soil. Water your plant when the soil is dry, but be cautious not to overwater it. Repotting the plant every few years in fresh soil can also help promote root growth. Additionally, use fertilizer specifically formulated for succulents to give your Haworthia the nutrients it needs. With proper care, your Haworthia’s roots will thrive.
What is the lifespan of Haworthia?
Haworthia is a group of small, slow-growing succulents that can live up to 30 years or more with proper care. Their lifespan depends on various factors, such as the environment they’re in. By providing a warm, sunny spot and regular watering while protecting them from extreme temperatures, you can help ensure a long and beautiful life for your Haworthia plants.
Conclusion
In conclusion, propagating Haworthia is a rewarding and straightforward process. By following the right steps and using the appropriate techniques, you can create stunning plants that will bring joy for years to come. Remember to be patient as your offsets or seedlings take time to root. Taking care of your Haworthia after propagation involves providing adequate sunlight and water, keeping in mind that these plants grow slowly. During repotting, use well-draining soil and be cautious about over-watering.
While water propagation may seem convenient, it doesn’t always yield reliable results. Stick to reliable methods such as offsets and leaf cuttings for better success. With proper care, your Haworthias will develop their own roots within a few weeks. Enjoy the process and the beauty of these unique succulents!