Echeveria Compton Carousel: Characteristics and Care
Are your Echeveria Compton Carousels struggling to thrive? Tired of their dull, leggy appearance? Fear not! This guide will transform you into an Echeveria master with lush, colorful rosettes. Keep reading to unlock the secrets.
Contents
About Echeveria Compton Carousel
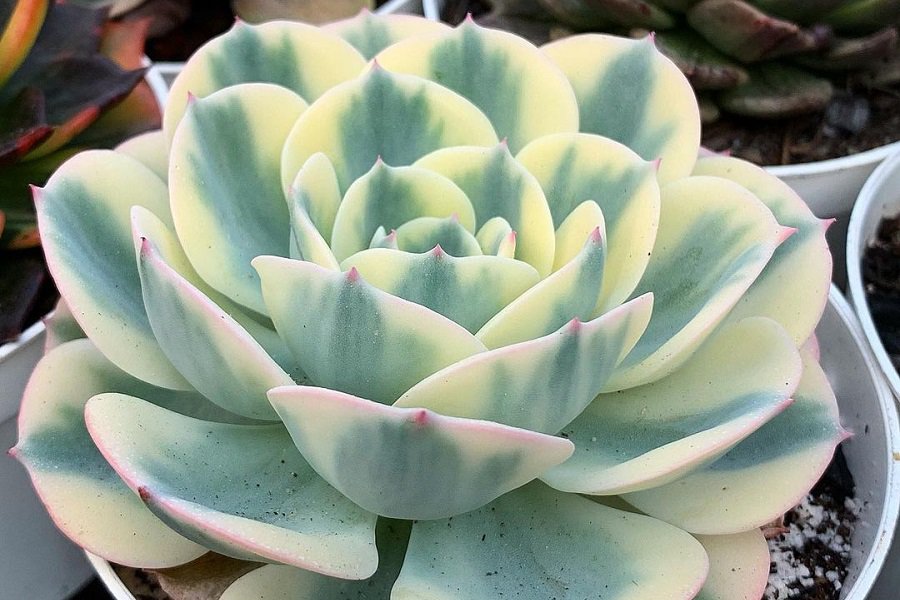
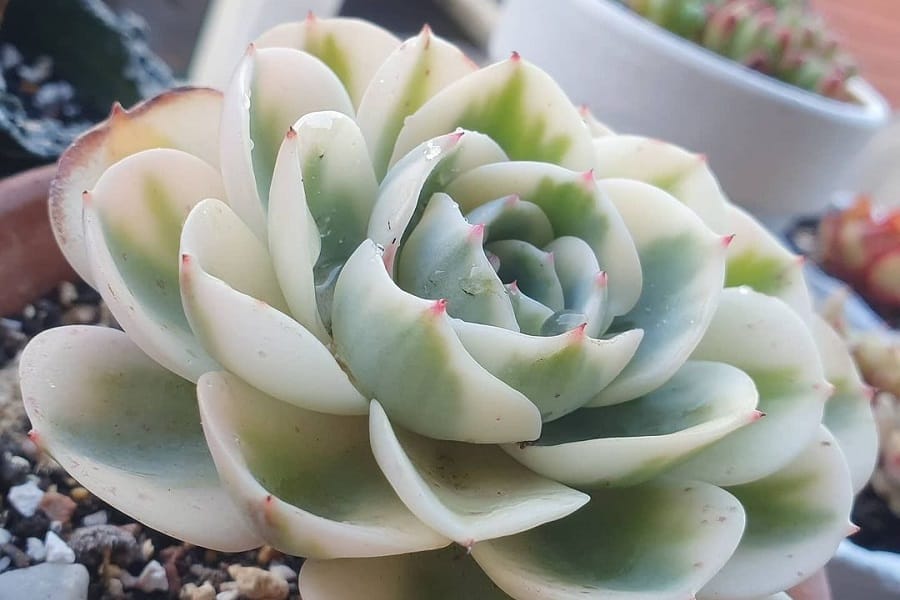
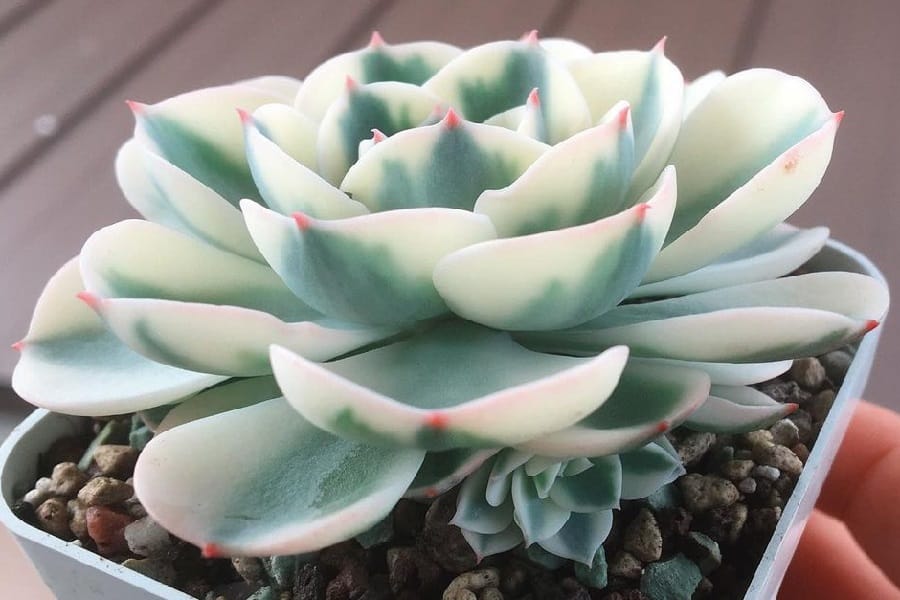
The Echeveria Compton Carousel, also known as Echeveria ‘Lenore Dean’, is a captivating succulent hybrid with tight rosettes up to 6 inches tall and wide. Its fleshy bluish-gray leaves have cream-colored edges that add striking contrast. During summer, vibrant orange and yellow flowers shoot up 1 foot above the plant.
This eye-catching succulent belongs to the Crassulaceae family and descends from parents cultivated in the 1800s. Despite its regal appearance, the Echeveria Compton Carousel is remarkably easy to care for when you know the proper techniques.
Check this out:
160+ Amazing Echeveria Types with Pictures
Echeveria Compton Carousel Care Guide
Light Requirements
Echeveria Compton Carousels need at least 4-5 hours of direct, bright sunlight daily to maintain their gorgeous colors and compact shape. Insufficient light will cause stretching and prevent blooming.
During summer, move your plant outdoors to let it bask in the sunlight. For indoor plants, supplement with a grow light positioned 6-12 inches from the top of the plant for 12-16 hours per day. LED or fluorescent grow lights work well.
Water Needs
Like most succulents, Echeverias store water in their plump leaves, so err on the side of underwatering. Allow the soil to fully dry out before thoroughly watering, ensuring drainage.
Signs of overwatering include wilting, wrinkling, or dropping leaves. Conversely, if underwatered, the plant will start shriveling. Water more frequently in spring and summer during active growth, reducing to once a month in winter dormancy.
Always water the soil directly and avoid letting it pool on the rosette to prevent rot.
Soil Preference
Plant your Echeveria Compton Carousel in well-draining cactus/succulent soil found at garden centers. Or create your own gritty mix by combining 1 part potting soil with 1 part perlite or coarse sand for aeration. Proper drainage is crucial for these rot-prone plants.
Use containers with drainage holes and empty the water catchment tray after watering to prevent soggy soil.
Temperature and Humidity
These sun-lovers thrive in warm (65-80°F), dry conditions typical of indoor settings with 40-50% humidity. Aim for temperatures around 70°F in summer and a few degrees cooler in winter.
Excessive cold, frost or high humidity often leads to issues like rot and pests for your Echeveria. Provide excellent air flow and bright conditions to discourage problems.
Fertilizing
Echeveria Compton Carousels are accustomed to nutrient-poor environments, so go easy on fertilizer to avoid burn. During spring and summer growth phases, you can apply a balanced, diluted succulent fertilizer every 2-3 weeks if desired.
Simply mix the fertilizer at 1/4 the recommended strength to give your plant a gentle boost without overwhelming its sensitive roots.
Potting and Repotting
When potting Echeverias, use a container just slightly wider than the root system with ample drainage holes. This prevents the soil from remaining saturated which can cause rot.
Only repot your plant when it has become rootbound, allowing the soil to dry fully first. Spring is an ideal repotting time as the plant emerges from winter dormancy. Use a fresh batch of cactus/succulent potting mix for best results.
Echeveria Compton Carousel Propagation Methods
One of the simplest ways to increase your Echeveria collection is through propagation. First, a quick intro on methods:
- Offsets: Mother plants naturally produce clones via offsets sprouting from the main stem
- Leaf Cuttings: Individual leaves can generate full new plants
- Seeds: Echeverias produce seeds after flowering that can be sprouted
Now, let’s dive into step-by-step propagation:
Offsets
- Allow offsets to reach 1/3 the size of the mother plant
- Gently detach offsets from the base using a clean, sharp knife
- Allow offsets to callus over for 3-5 days before planting in dry soil
- Water sparingly until new roots emerge in 2-4 weeks
Leaf Cuttings
- Remove healthy lower leaves by gently twisting them off
- Allow leaf cuttings to callus over for 3-5 days
- Lay calloused leaves on top of dry soil mix
- Roots and rosettes should emerge in 4-8 weeks
Seeds
- Sow fresh seeds shallowly in well-draining soil
- Cover seeds with light sprinkling of soil or grit
- Keep soil lightly moist and provide bright light
- Seedlings will emerge in 2-8 weeks