Cutting Back Succulents: How to Keep Them Perfectly Petite
Have your once-compact succulents morphed into towering, leggy specimens? Watching those adorable little plants stretch toward the sky can be disheartening for any succulent enthusiast. If you’ve found yourself wondering, “Can I cut back a succulent that’s gotten too tall?”, you’re not alone. Pruning overgrown succulents is a common concern, but with the right techniques, you can restore their charming, full figures and encourage denser, more attractive growth. In this guide, we’ll explore when and how to cut back stretched succulents to revive their beauty and promote a healthier shape.
Contents
Why Do Succulents Get Leggy?
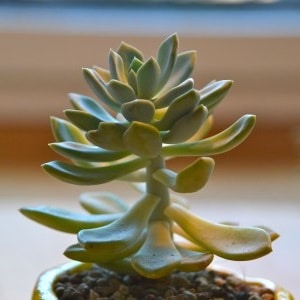
If your succulents look like this, they have probably received too little light. A plant always stretches in the direction of the light, this movement is called phototropism, which is why a plant often grows crooked. Too little light leads to increased, thin longitudinal growth of the internodes (parts of the stem axis between the nodes), i.e. the distance between the nodes at which the leaves are formed are longer than normal – leaving your succulents with long stems and growing tall.
What’s better than succulents? Even more succulents!
But when succulents get leggy, don’t worry. This is the optimal time to propagate this plant and bring it back into shape!
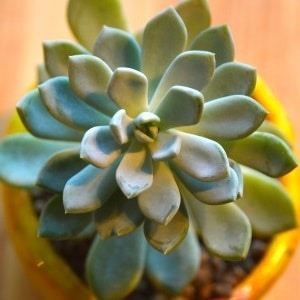
Since this Echeveria is still beautiful from above, we can use the upper part as a smaller, shorter version of this plant, so to speak. Head cuttings consist of a shoot tip with a stem and usually a few leaves. They can be cut from most plants whose shoot tips are located at the end of above-ground shoot axes (stems, trunks, branches). The rosette cuttings, which are cut from plants with rosette-shaped growth and therefore short internodes, also belong to the head cuttings.
How to Trim Tall Succulents
When your succulents start reaching for the sky, it’s time for a little trim! Grab a sharp knife or a trusty pair of pruning scissors if you don’t have one on hand. Don’t worry, most succulents are tough cookies and can handle it. To ensure healthy growth, make your cuts nice and horizontal. This will keep the wounds small and minimize the chance of dirt collecting in those spots. Remember, it’s always better to make a small cut than a big one.
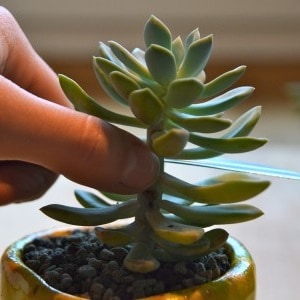
When it comes to snipping your succulents, aim for a spot just a few millimeters below a node. This is where all the good stuff, like growth substances and assimilates, gather. These goodies are crucial for the healing process of the wound and for the regrowth of any missing parts. As you behead your succulent, make sure to shape it in a way that forms a lovely round rosette when you look down at it from above. Get ready for some impressive regrowth and a garden full of flourishing succulents!
Preparation for Planting
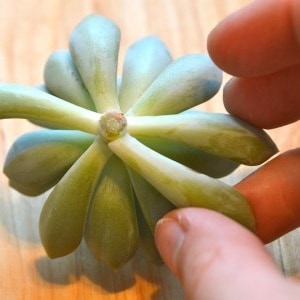
To prevent any rotting mishaps, delicately wiggle the lower leaves to the right and left to remove them from the soil. When it comes to beheaded succulent cuttings, it’s important to give them some time to dry out. Let them be for a few days to weeks so that the cut surface and where the leaves used to be can form a protective callus. This callus tissue works wonders in closing the wound and aiding in proper healing. Plus, if you leave them a little longer, you might just witness the formation of fine roots. Check out the picture of my Echeveria head cutting after 4 weeks of this pruning process – it’s finally ready for potting!
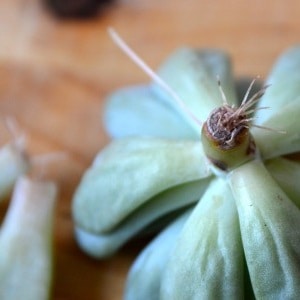
The Remaining Stem
Now, let’s gracefully separate the remaining leaves on the stem by gently swaying them from side to side. Keep in mind that torn leaves are no longer suitable for rooting, so it’s best to avoid using them. The same goes for leaves that may have become stuck on the stem axis when you attempt to trim them – they won’t be able to form roots either.
Alternatively, if you prefer, you can choose to leave the bottom leaves intact while removing only the top ones. This way, you create space for fresh new shoots to sprout and flourish.
“Anyone can love a rose, but it takes a great deal to love a leaf.”
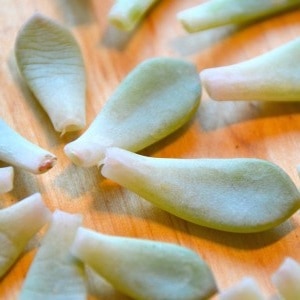
After separating the leaves, it’s important to let them air-dry until a callus forms. You’ll be thrilled to know that if you decide not to plant them immediately, these leaves often sprout roots and new shoots on their own.
But if you’re eager to get them in the soil, placing larger leaves at a slight angle is the way to go after the callus has formed. You might even luck out and see multiple small plants emerging from a single leaf! Smaller leaves can be placed on the soil similarly. Whether you prefer an organic mineral or a purely mineral substrate, both options work well as planting mediums. Get ready to witness the magic of growth!
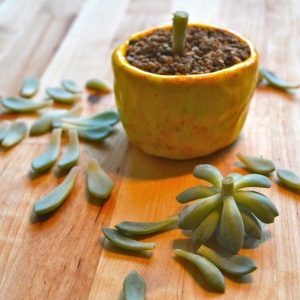
When it comes to obtaining leaf cuttings from a mother plant, you’ll be amazed at the abundance you can collect. However, it’s essential to note that not every leaf will yield results. Some may only develop roots, while others might grow a new shoot without any roots yet.
But here’s the exciting part: if luck is on your side, you might witness the emergence of new small plants on the stem itself. Every spot where a leaf was removed holds the potential for this delightful surprise. Keep your fingers crossed and watch as your succulent family expands before your eyes!
How About You?
Have you encountered any other instances of trimming succulents that are too tall? I’m curious to hear about your personal pruning adventures. Feel free to share any tips or tricks you’ve discovered along the way. Let’s exchange our experiences and help each other out in the wonderful world of succulent care!
